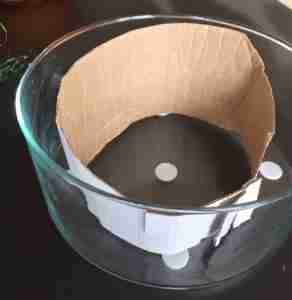
 I wanted to make something that was simple to do and had aquarium plants. This method is called many things, wabi sabi, insularium, wabi kusa, emersed, among others. To begin with I found a suitable jar that I could use. This one came from IKEA and I claimed it for plants. I think it comes in a set of three with each one being a taller cylinder type. This is the way I added sand and soil.
I am using emersed aquarium plants to make this Biotop emersed. All the plants aren’t from the same biotope, and the sand doesn’t necessarily match either. It isn’t a direct and literal interpretation of a biotope. I just call it a Biotop because it’s the German word for biotope and the Agrarium and other things are German named. I used a natural sand of a 2mm or so average grit. For the soil I used a potting mix for regular houseplants. Nothing special in either of the two since there are no real special requirements for these plants like there might be for carnivorous plants.
The purpose of the cardboard is to keep the soil media separate from the sand. The outside of the substrate is visible and I wanted to make only the sand visible for aesthetic reasons. You may like the stratified soil look so you can add your sand or substrate how you like. I also added a thin layer in the bottom with sand to help with drainage and uniformity even though I will likely never be looking at the very bottom.
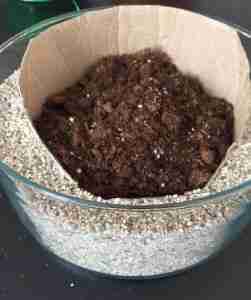 Using a funnel I appropriated form the kitchen I poured sand into the outside form. To break up the monotony I angled the sand and was careful to keep it at a slight angle. The depth of the sand and dirt isn’t so much of a priority either.
You will need at least a couple inches of substrate for the plants to grow into. Most aquatic plants seem to do well with a shallow root system anyway. Cryptocorynes and echinodorus are two heavier rooting plants that will need at least a couple inches of medium for them to grow well. Once you have your outside sand or media in and the inside poured in you can remove the cardboard form by gently moving it back and forth slightly while you pull it up.
I preferred to cap the potting soil with more sand to get a more uniform look. You can either cap it with the same sand on the sides, a completely different topping, or just leave the center potting soil. I added about 3/4 of an inch of the same coarse river sand that I put on the sides.
 I moved around the driftwood a bunch of times to see what I liked better and what fit. I chose to have the driftwood standing above the rim for more depth. The pictures of course make it hard to tell much about the 3 dimensional aspects. After I got the driftwood settled in I added my 3 portions of plants I got from the aquarium shop. Using a pair of JBL forceps about a foot long with the angled tip and a couple tweezers I found at local hardware shops (I got rid of all my tools before moving to Berlin and I haven’t ordered any new ones as the parcel delivery setup here is sickeningly abysmal).
I added the taller growing plants into the background and worked on shorter plants to the front. This should be pretty much self explanatory so that you can see everything. Off to one side I used mid ground plants and shorter matting type in the front. I pretty much stick to this same kind of design. There’s tons of pictures of inspiration on Google image searches so take a look through there for some insight and ideas. I tried to balance it so that it would draw the eyes to the left upper center which is the driftwood to tie everything together.
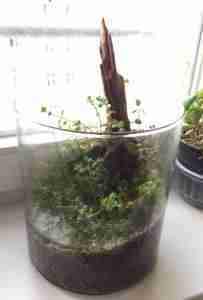 The plants were likely all grown emersed anyway and it only took a few days for them to acclimate to room humidity. I used the plastic bag that the plants came in as a humidity shield. I placed it over the top to keep in the moisture. Every day I would open it slightly more and more until it was acclimated. Using a small atomizer spray bottle helps a ton getting aquatic plants to acclimate to emersed growth. A few sprays a day goes a long way. Keep the plastic on and spray several times a day for the first couple days. Then crack open the plastic cover and spray. Over several days open the plastic cover more and spray less. Don’t use the “go big or go home” unles you like to keep a record of dried dead plants you used to have. Go slow and it will work.
Once it is acclimated to room humidity I placed it near a window. I rotate is every few days as the plants want to grow toward the light slightly and I want them to fill in. Once they fill in I trim them back to varying heights for added depth. This one is only three portions of plants and it will take a while to fill in. I used to make my own foliar spray with the Agrarium formulas for my planted tank and emersed propagation. Since I moved to Berlin I can’t buy KNO3 so I have to make another formula that is government approved. I will likely make a foliar spray fertilizer with a diluted water soluble solution to spray a few times a week.
 UPDATE
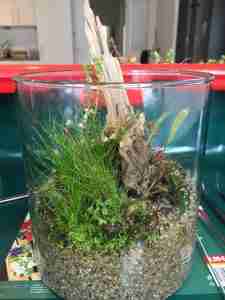
I decided to let the Biotop go and quit spraying or spritzing it at all whatsoever. Over the course of several weeks there have been leaves dying back here and there and a lot of overgrowth from others. I trimmed it back to help balance out the plants and will keep it trimmed in balance until it fills in completely.
It had become a nest of plants and was beginning to be unruly and without aesthetics. Again, we see so many containers planted and photographed but prolonged growth isn’t documented. I wanted to make something that would progress naturally without much work in maintenance other than trimming and adding water or cleaning the glass. There is no heater, no additional lighting, and I haven’t fertilized it yet (only the fertilizer that was in the potting mix).
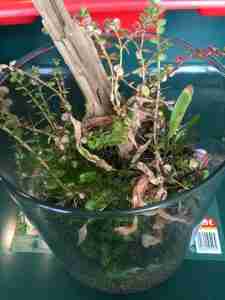 In this photo to the right you can see that it was a ball of plants and not too good looking aesthetically. I had already started removing plants when I thought to take a photo so some plant growth had already been removed before this photo.
Plants that were thinned were put into an emersed plastic shoebox bin in order to grow out more plants for future projects. Throwing away plants that are useful is throwing away plants. They’ll grow in and be useful soon enough, that or trade them or give them away.
Just wanted to show the progress of this low maintenance low tech Biotop jar. It’s relatively easy to do and inexpensive also. There’s a ton of recyclable glass out there and lots of inexpensive plants ready to make something.
 Biotope One A Study of Flora and Fauna


